After creating the email account in cPanel you can configure it in your Outlook 2016 as follows:
1.- With Outlook 2016 we click open on File:

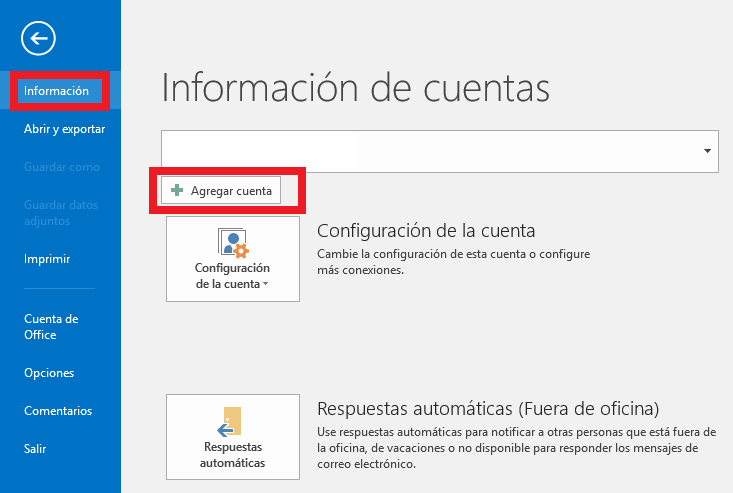
2.- Next we click on Information -> Add account.
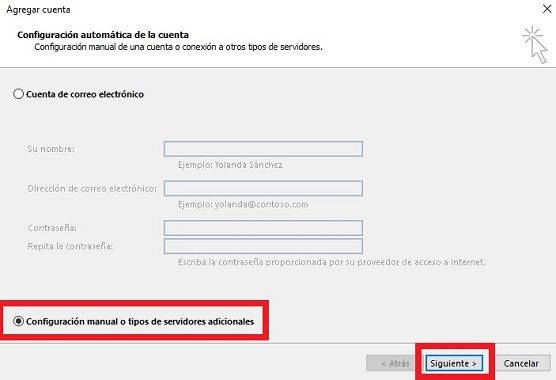
3.- A new window will appear and we will select Manual configuration or additional types of servers and click on Next.
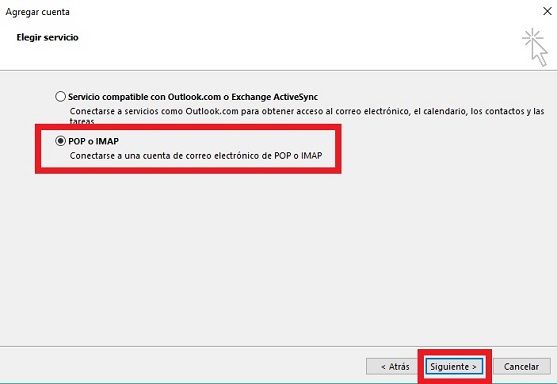
4.- Then we mark POP or IMAP and click on next.
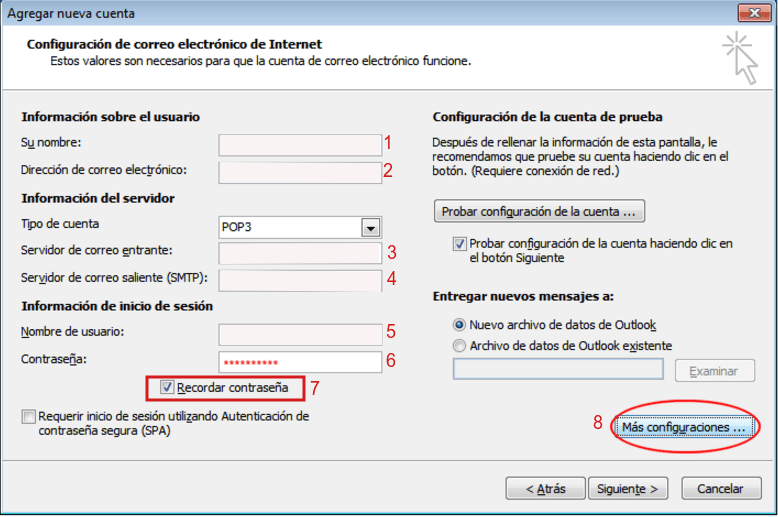
5.- The next window that opens will be to configure the data of our account.
-
Your name: will be the sender, such as your name or your company name.
-
Email Address: This will be the account you are currently setting up, for example info@yourdomain.com.
-
On incoming mail server (POP3 or IMAP) and outgoing mail server (SMTP). It will be the data of your account that you can consult in your cPanel.
In username you will add your email account, for example info@yourdomain.com.
You must add the password of your email account and select the option Remember password.
Go to the Outgoing server tab and check the My outgoing server (SMTP) requires authentication and uses the same settings as my incoming mail server.


In this case we have selected SSL and the ports that appear are the recommended ones if you activate SSL.
In case you do not check SSL you must put the following ports:
POP3 incoming server: 110
Outgoing SMTP server: 587
You only need to click accept and you will have your email account in your Outlook 2016 application.
